Looking back at your preliminary task (the continuity editing task), what do you feel you have learnt in the progression from it to full product?
As stated within the specification, we had to produce a continuity edit piece for our preliminary task. The criteria stated that we need to include a shot-reverse-shot, the 180 degree rule and match on action. We developed a scenario for our task which was that a student had to go and collect her iPod off her teacher after listening to in during lesson time and breaking the school rules. We chose this as it is a relatively simple concept and thus less time-consuming to make. It is important to note that although we filmed together, we edited each task individually. We did this before we created our opening sequence as a way of gaining a better understanding about the use of camera angles, shots and movements.
Continuity Edit Piece:
The first shot above shows Sarah in our preliminary task, whilst the shot underneath shows Megi in our opening sequence. I've used these two shots as they show how we had to use a pan in order to show all of the action that was occurring. For the preliminary task, the use of the pan was to inform the audience that Sarah was approaching the door of a classroom of which she was going to enter. For the opening sequence, the pan was used to show Megi and the basement environment that she was surrounded by to reinforce how she had been kidnapped.
However our methods of filming for each task were different. For the preliminary task, we used a tripod in order to create a smooth pan which flowed for the audience. For the opening sequence, we had to attach the tripod to a moving stool which acted as a dolly because the shot was very wide and we had to ensure that we got all of the props in the shot to create authenticity of the location for the audience.
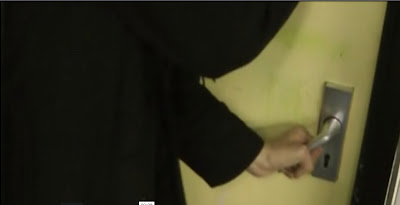
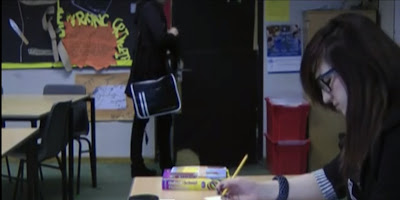
These two shots show how we had to film in two different locations in order to create the continuity. The first shot shows Sarah opening the door, whilst the door underneath shows Sarah entering the classroom. We had to film the first shot in the corridor of the West Block floor and Sarah needed to ensure that she remained in the same posture and position to create continuity for when she opened the door. For the second shot we had to film in the classroom by positioning the camera on the tripod behind the table that Megi is sitting on to ensure that we filmed Sarah as she entered the classroom and kept Megi in the shot to show how she was waiting for her. These are the two main shots that need to be efficiently combined in post-production to ensure that they created a sense of continuity.
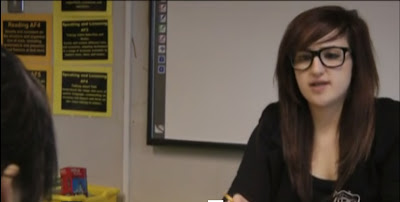
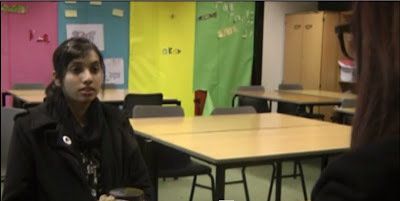
These two shots show the conversation that Megi, as the teacher, and Sarah as the student have. This shows how we have used the over-the-shoulder shot to show the characters point of view whilst they interact and thus create a shot-reverse-shot. We had to film this conversation twice to ensure we got the perspective of each character. This meant that we had to create a short script for Sarah and Megi to learn in order for their to be coherence and consistency. When we filmed behind Megi's shoulder to show Sarah giving her response, we had to ensure that she was positioned higher on her chair to show how she is a teacher asserting her authority, whilst he student Sarah is smaller in size to enforce how she is vulnerable, although she in the story is in the wrong. In post-production it was hard to create this continuity flow because I had to expand the clips into their frames so that I could precisely cut off bits that were not required, which took a few attempts to ensure that it look continuous.
Opening Sequence:
This shows a close-up of the left side of Megi's face. It is one of the first shots to be shown in the sequence and serves as a device to keep the audience engaged and intrigued because Megi has bruises on her face and gaffa tape on her mouth. For the audience this suggests that she has been kidnapped and abused and therefore they would be inclined to watch the rest of the sequence in hope that it reveals how and why she got in this situation. The use of lighting in this shot reinforces this because it acts as spotlight as if somebody is going to interrogate, or already has because of her condition and state.
This is a mid shot of Megi. We used this shot because it shows Megi's uniform and her adjusting her tie which suggests that she is a school girl and ultimately this flashback portrays how Megi was getting ready for a normal school day and then suffers a horrific ordeal. The use of black and white also help to convey this as a flashback.
This is a long shot of Megi walking to school whilst talking on the phone. You can see her full school uniform which reinforces how she is a innocent school girl who is just making her normal journey to school. We had to record Megi on the other side of the road to ensure we got a long shot of her and included all of her in the frame.
This is another close-up of Megi's face which has purposely been used to show the fear in Megi's eyes. The gaffa tape is fully on display here where depicts how Megi has been taped in order to prevent her from calling for help. The blood on Megi's neck also shows how she has been physically abused and harmed which portrays her torture.
This is another long shot of Megi approaching her school reception which shows she has arrived at her destination. We deliberately used this shot because it shows how Megi managed to arrive at school, but it opens up suspense for the audience as they question how she has now got into the current kidnapped situation that she is in and suffered this traumatizing ordeal.
This is a high angle shot of Megi and is one of my favourite shots used throughout the sequence. This is because it creates an atmosphere for the audience, where tension is heightened because is is as if somebody is spying on her and she is being watched. To get this shot we had to stand on a chair. Similarly, we used a high-angle shot when we recorded Sarah's hand opening the door in the preliminary task because it adds emphasis which shows our progression because we have now used this shot accordingly to our genre of Thriller.
This is a high-angle shot of Megi's legs and the legs of her abuser approaching her. In this context we have used this shot focusing on the bottom half of Megi rather than the top, to create fear and suspense for the audience because they can sense that something is wrong as these big feet approach her. This also makes the abuser appear scary and domineering over her.
From the process of making our preliminary task to our opening sequence I have learnt a lot of new skills. Firstly I learnt how creating a pan to show an environment and its surroundings is vital in order for the audience to perceive the narrative. Through showing the mise-en-scene it is essential because it gives clues to the audience and thus creates interpretations. I also learnt that positioning the camera has to be done very sharply and smoothly in order to define the shot e.g. the high angle shot in the preliminary task informs the continuity editing and creates an effect for the audience. The positioning of the camera to show a shot-reverse-shot is also important because you have to adjust the camera on an angle where you can see person one in the shot, whilst you can still see person two interacting with them. Therefore you have to ensure that you are showing the perspective of person one correctly with the right angle.
Equipment wise, I learnt how the use of a tripod creates a smooth flow and definition for the audience. This creates authenticity and gives a sense of professionalism for the audience. I also learnt that although we didn't have the professional required equipment, we could still stick tape the tripod to the moving stool which acted like a dolly and henceforth allowed us to create a smooth pan of Megi in the 'basement'.
I was already familiar with Adobe Premiere where we constructed our music video (as we did A2 before AS due to certain circumstances) and therefore didn't find it hard familiarizing myself with this software for constructing our opening sequence. We were able to align the clips in their playing order and create effects such as changing some clips to black and white using the monochrome tool to show the flashback. However, I did learn how to insert titles and they can take up time by aligning them so that all of the titles stay consistent throughout.


No comments:
Post a Comment